On social media, videos are often more engaging than static images. Today, we’ll show you how to use Imagemover.AI to turn your images into captivating Image to Video creations. Example: Turn a photo of Iceland’s Seljalandsfoss Waterfall into a dynamic video.
Why Turn Image to Video?
Turning image to video has several key advantages:
- Higher Audience Engagement: Videos are usually more engaging than static images, especially on social media. Compared to photos, video content tends to get more likes, shares, and comments.
- Enhanced Creative Expression: Once your image becomes a video, you can add dynamic elements, transitions, and visual styles that make your content more appealing and impactful.
- More Expressive Storytelling: Videos can tell a fuller, more engaging story. They add more depth and emotion compared to a single still image.
Steps to Turn an Image into a Video Using AI
1. Pick an AI Tool to Convert Your Image to Video
There are several AI tools that can help you turn image to video. Here are a few popular options, each with its own features and benefits:
- Imagemover.AI: This tool is simple and user-friendly, making it perfect for beginners. Its free version is more than enough to get started and can easily turn your still images into dynamic videos. You even earn reward points for logging in daily, which you can use to unlock advanced features and effects.
- RunwayML: This powerful tool supports advanced creative options like AI editing and deep compositing. It’s perfect for users who need highly customized videos. However, the free version is limited, making it better for professional creators.
- Deep Dream Generator: This tool focuses on adding dreamy, artistic effects to images. It’s ideal for artists looking for unique visual styles. Although the free version has limited features, the results are distinct and visually striking.
For most users, Imagemover. AI’s free version provides everything you need to turn image to video quickly and easily. Its simple interface and fast video generation make it an excellent choice for creating content on the go.
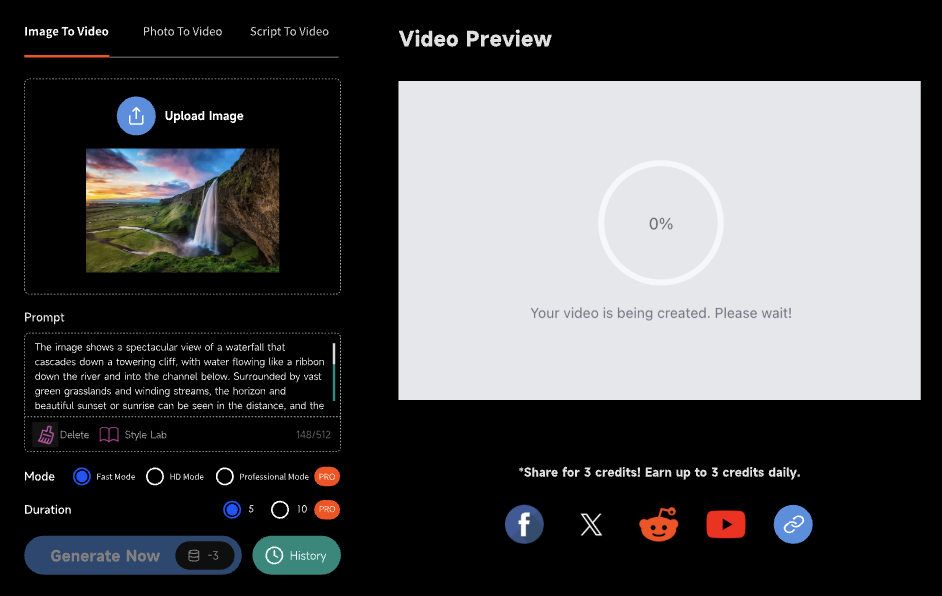
2. Upload Your Image to Imagemover.AI
First, log in to Imagemover.AI and upload the image you want to convert into a video. Make sure your image has a high resolution to ensure good video quality. The tool supports popular image formats like JPEG and PNG.

3. Choose a Video Style
Imagemover.AI offers several video styles to add dynamic effects to your image. Some common styles include:
- Low Angle: Shot from below, this adds a sense of power to the image.
- High Angle: Shot from above, this creates a bird’s-eye view.
- Wide Angle: Uses a wide lens effect to increase the field of view.
- Close-up: Focuses on a specific detail to highlight it.
- Tracking: Follows moving objects to make the video more dynamic.
- Slow Motion: Slows down the action to emphasize details or add drama.
- Fast Motion: Speeds up the action to create tension.
- Time-lapse: Speeds up long-duration footage to show the passage of time.
Click “Style Lab” and choose the style that best fits your video and the mood you want to convey.

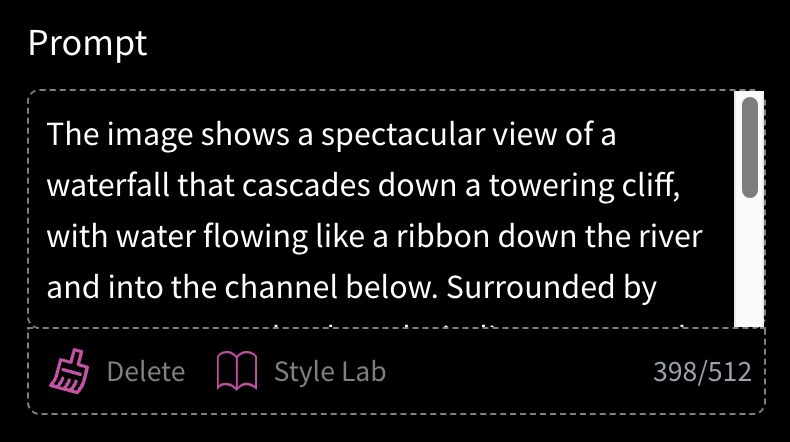
4. Add Keywords
You can input keywords to help the AI understand the content of your image. For example, describe details such as the environment, lighting, and colors to help the AI generate the effect you’re aiming for.
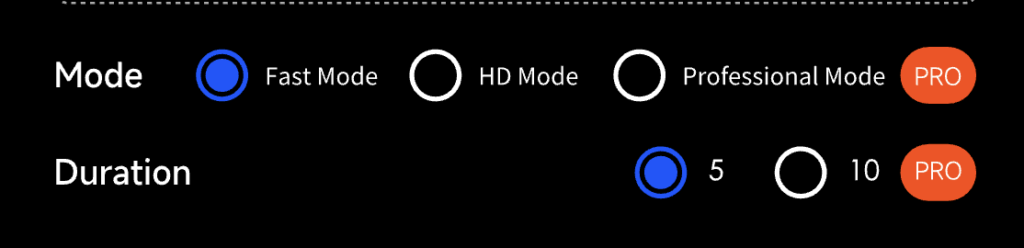
5. Customize Video Settings
Once you’ve chosen a video style, Imagemover.AI lets you customize other video settings, such as:
- Model Selection: Choose the right AI model for your needs. For instance, “Fast 1.4” works well for short videos and many images, and it processes quickly. “HD 1.5” offers better video quality, while “Professional 2.0” is for high-quality, professional results (available only in the paid version).
- Duration: Set how long the video should be to ensure each shot is shown for the right amount of time.
6. Convert image to video, preview, and adjust.
Click “Generate Now” to turn your image into a video and preview the result. Watch it to see if it looks the way you want. If needed, you can quickly adjust the settings until you’re happy with the final video.
7. Add Background Music
You can add background music or sound effects to make the video more immersive. Choose music that matches the vibe of your video, such as natural sounds or soft background tunes.

8. Download or Share Your Video
Once you’re satisfied with your video, click the download button, and Imagemover.AI will generate an MP4 file for you to save. You can upload your video to platforms like YouTube, Instagram, or Facebook, or share it with friends and family.
Example: Converting an Image of Iceland’s Seljalandsfoss Waterfall
Let’s say you upload a scenic photo of Iceland’s Seljalandsfoss waterfall. Known for its stunning beauty and the unique experience of walking behind the waterfall, it’s a perfect image to showcase with AI animation. Here are some keywords and custom effects you can use to turn this image into an engaging Image to Video creation:
- Keywords: “The image shows a spectacular view of a waterfall cascading down a towering cliff, with water flowing like a ribbon down the river and into the channel below. Surrounded by vast green grasslands and winding streams, the horizon and a beautiful sunset or sunrise can be seen in the distance, and the sky takes on a dreamlike color of blue and pink interweaving to create a powerful natural scene.”
- Video Style: Use a close-up shot to highlight the flowing water of the waterfall, showcasing the mist and surrounding nature to capture Iceland’s pure beauty.
- Transition Effects: Use smooth transitions that mimic the flow of water, making the video switch naturally and seamlessly.
- Background Music: Add natural sounds like water flowing and wind blowing to enhance the immersive experience, making viewers feel like they are standing by the waterfall.
By using these keywords and video styles, you can turn your Seljalandsfoss image into a dynamic video that captures attention.
Tips for Turning Image to Video with AI
- Image Quality: The higher the resolution of your image, the better the video quality will be. Make sure the image is clear and detailed, especially in terms of color and texture.
- Choose the Right Video Style: Select a style that matches your content and audience. Too many complex effects can distract the viewer, while simple transitions often create a better impact.
- Importance of Music: Adding background music or natural sound effects can deepen the emotional impact of your video, improving the viewer’s experience.
Applications of Image to Video Tools in Various Fields
Marketing Campaigns
Companies can turn product photos into cool promotional videos. These videos can be shared on social media, websites, or in emails to grab attention and boost engagement.
Product Demos
Businesses can make product photos come alive with animations. This helps showcase features better than static images, especially for online stores or customer presentations.
Training & Tutorials
Instead of using boring images, companies can create fun video tutorials. Animated videos make complex ideas easier to understand and remember for employees.
Event Promotion
Turning event photos into short, lively videos helps attract more people. Share these videos on social media to spread the word and get folks excited to attend.
Client Presentations
Spice up slideshows by adding motion effects to images. Videos make ideas or products look more impressive during meetings with clients.
Social Media Content
Videos get way more likes and shares than regular photos. With these tools, businesses can quickly turn images into eye-catching posts for Instagram, Facebook, or TikTok.
Conclusion
Turning image into video with AI is a creative process that breathes life into static image and adds more visual impact and storytelling. Whether for social media, business projects, or personal creations, AI tools can easily help you achieve your image-to-video dreams.
If you haven’t tried it yet, give Imagemover.AI a go and transform your image into stunning videos, bringing more energy and creativity to your work!